

How to Create Login Form in Java Using Netbeans Updated FREE
How to Create Login Form in Java Using Netbeans

In this commodity, we will exist learning how to create a login form in Coffee using NetBeans.
Installation of NetBeans
The Java SE Development Kit(JDK) seven or JDK 8 is required to install the NetBeans IDE.
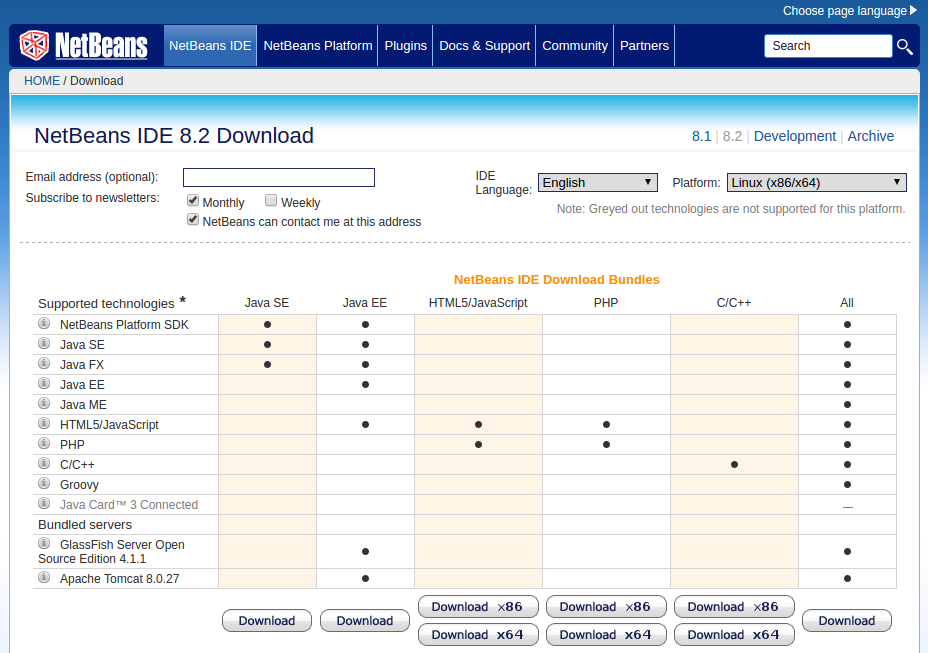
Now, download the latest NetBeans IDE from its official channel. Download the whole IDE packet version depending upon your processor architecture. The user can add together or remove the packs using the IDE'due south Plugin Manager. You tin can check out the steps to install and apply NetBeans in this article.
Assume that you have successfully installed NetBeans on your auto. Start the NetBeans from the Window. The NetBeans main window will appear equally shown beneath.

The NetBeans chief window contains menus, toolbars, the project pane, the files pane, the runtime pane, the navigator pane, and other panes. The NetBeans main window is the command heart for the IDE.
Read More: Jobs In Demand For 2020 & Beyond: 15 Careers Yous Can't Ignore!!
Creating a blank Project
To create and run a program, you have to first create a projection.
Hither are the steps to create a demo project
Footstep ane: – Choose File and New Projection to display the New Project dialog box.
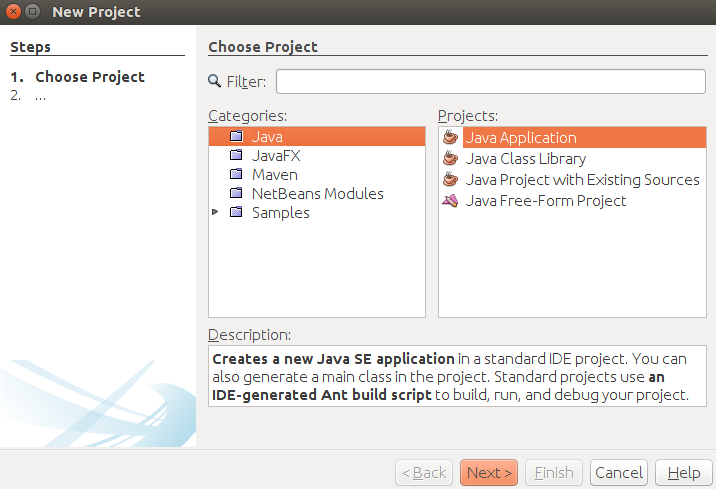
The new project box enables yous to specify the projection type.
Step 2: – Choose the Java type from the given listing.
Footstep iii: – From the New Application Tab, enter the project name and unselect the main grade from it.
Login Form
These steps are to be followed.
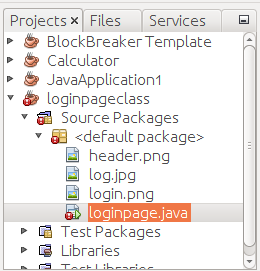
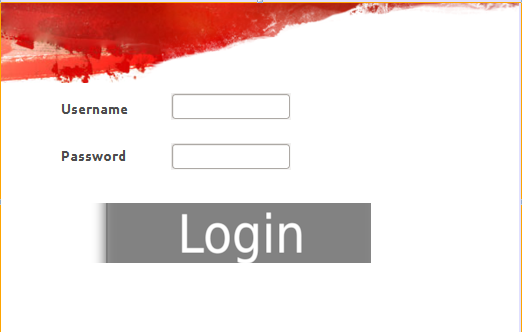
Step 1: – Create a blank Java project with the name loginpageclassy. Uncheck the Main form choice from the project tab. Annotation downwardly the accost of the directory and download whatsoever prototype for a groundwork and login label and for the header a shown below.
Step2: – To add a JFrame, right-click the project name in the Project window.
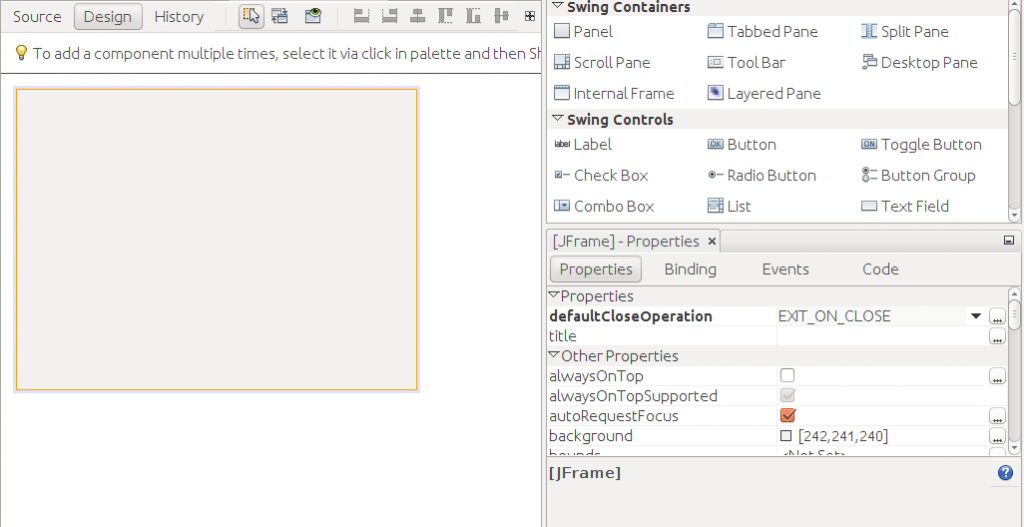
Footstep 3: – Now right-click the JFrame, click Set Layout and select Null Layout from the pick.
Step 4: – Open up the project folder and drag those images into the project field equally shown below.
Step5: – At present drag a characterization field from the palette. Right-click on the Jlabel button and select icons, where yous can select the image for that item label. Make this characterization the background of the projection by extending it to all the four corners of the JFrame.
Step6: – Right-click on the label field to enter into the Properties and select the icon to set the custom icon for the characterization. Make this label the background of the project past extending it to all the four corners of the JFrame.
Step7: – Now drag a Text Field and a Password Field from the Pallette into the JFrame. Now, Drag 3 more labels into the JFrame for labeling the Username, Password and for the Login button.
Step8: – Set the Text field and the Countersign field to empty. Rename the label for the Username and the Countersign. Therefore the whole form appears as below.
Step9: – Now, Correct-click on to the Login push button and select Events >>Mouse >>Mouse Click.
This volition direct it to the Source section.
Source Coding
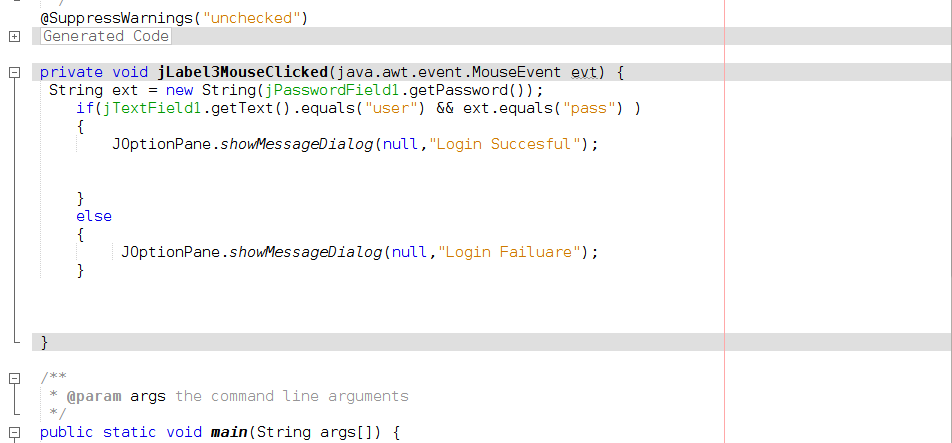
A string 'ext' is declared in club to get the text entered into the Password field. The text entered in the text field and the password field is compared with the Username and the password, which has been set already. If the text entered in both the fields match with the previously saved ones, the user gets a pop-up message showing that the Login was successful, else a Login Failed message volition appear.
Right-click on to the Login button and select Events >>Mouse >>Mouse Click.
This will directly to the below statement in the Source department.
private void jLabel3MouseClicked(java.awt.event.MouseEvent evt)
Declaration of cord and coding for the comparing Username and Countersign.
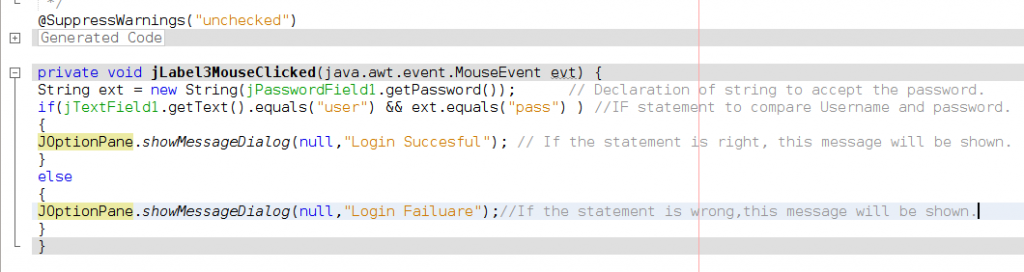
The diagram beneath lists the purpose of each argument used in this logic.
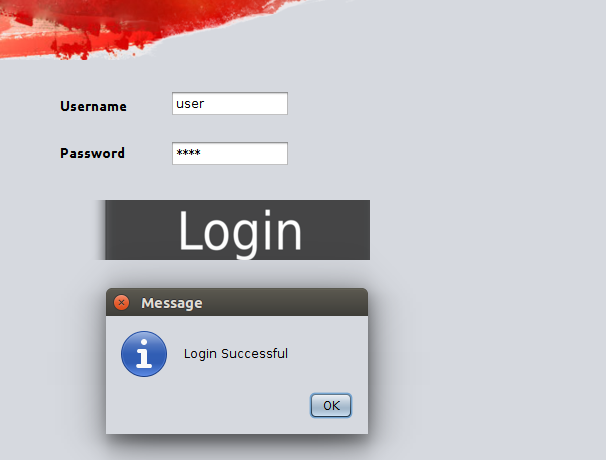
At present, Save the program and click the Run button.
The Login form will be shown. Enter the Username and Password correctly. This gives a message tab showing that the login was successful.
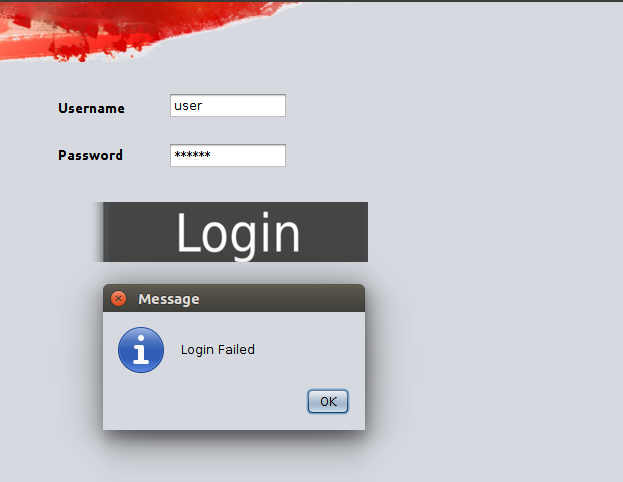
If the Username or the password entered is wrong, the screen shown below appears.
Now that you have successfully learned to build an impressive login page, you can also try making other projects such as creating a basic estimator in Java using Netbeans. Too, if y'all want to build more projects in Java as a beginner, effort "Learn Projects in Java for Beginners from Scratch" online course absolutely FREE!
Nosotros promise that this article has helped you in understanding the nuts of creating a Login Form. Feel free to contact us in case if you face any problems regarding the same.
People Are Too Reading:
- 10 Ways to Learn Java in just a Couple of Weeks
- Is It Possible to Utilise Java with iOS?
- Docker for Java Development Environment With Ubuntu
Latest Updates On Coronavirus
- Using Various Technologies To Prevent Coronavirus!!
- How Tech-Giants Are Using Engineering science to Fight COVID-xix?
- Coronavirus Touch on Top Tech Conferences Effectually the World

How to Create Login Form in Java Using Netbeans
DOWNLOAD HERE
Source: https://blog.eduonix.com/java-programming-2/learn-create-login-page-class-form-java-using-netbeans/
Posted by: costantinowitas1977.blogspot.com
0 Response to "How to Create Login Form in Java Using Netbeans Updated FREE"
Post a Comment